

3D Snake Drawing Step by Step. In this classroom exercise, I will share the drawing of a 3D snake. The tutorial will be exhaustive. We introduce it in composite, image, and video structures.
Also, check our 3d Drawing.
You can select one of the options that suit you best. 3D Snake Drawing Tutorial Exercise is a piece of pencil drawing and 3D drawing for beginners.
Draw Snake Step-by-step
Step 1
Begin your 3D snake drawing by dragging the pencil upwards at an angle from left to right. Define another border that is practically the same as its lines
Step 2
Define two additional bounds from the right end of the main result. Likewise, the lines should favor this possibility of the 3D effect.
Define another sloping boundary from the left end of the first pass result. Keep the length of this line a little more limited than the lines on the right.
Step 3
To make a 3D box look open. Draw a rectangular shape from the bottom of the front of the box.
If it’s not too much trouble, give it a 3D look by making the rectangular shape a little larger.
Start at the base, draw a long nut, and finish right off the case cover. Draw another nut shape that lines up with the lid’s top and looks open.
Define another border leaving 1/8 piece of cover. Merge this line with the long nut shape you drew recently.
Step 4
Draw another square shape inside the cubes we drew in the previous step.
Most of the assignment is taken out on the lower part of the container. Define a boundary from the center of the long right nut and bring it to the left to represent the depth of the case. Please give it a square shape by dragging down to complete it.
Draw the opening support inward using two similar, practically straight lines. Give the container a wooden look by defining different borders for each nut.
Step 5
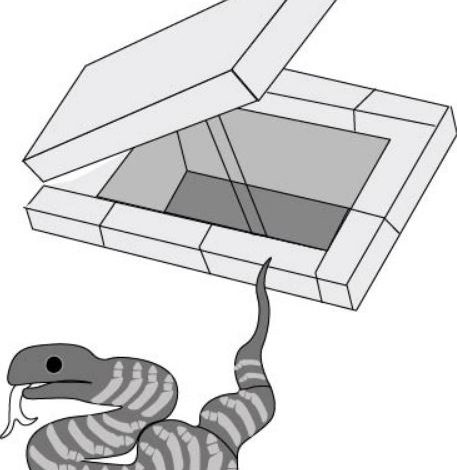
Begin Stage 5 by drawing the snake tail. The story should be clear. Define two beautiful boundaries that emerge from the story point. Both stunning lines should move towards the center with an expanding space.
Create more majestic shapes to make it look like the Snake is ready to attack.
After drawing the body, make the Snake’s head, drawing part of a circle at the top and a thin line at the bottom.
Pull out the tongue from two falling narrow uncertain lines with parted locks.
Step 6
Draw the outer layer of Snake with the pencil. Make a uniform example on the outer layer of 3D Snake. The example is drawn with cross lines on top of the Snake.
The base page plane has practically straight lines that leave a 3D effect.
Also, draw the hidden impact of the Snake.
Step 7
In the last step, apply the covering effect to the box. It helps to hide the container since it is made of wood. Concealment is increasingly rooted in wood as opposed to metals. Here’s an easy way to draw a 3D snake with a pencil.
Drawing Completed
I trust this instructive exercise will be useful to young people and beginners alike. The craft of snake drawing is easy, but it might not be easy even if it might not properly delineated. Our expert group has explained it comprehensively for better understanding.
Also read: 10 Best And Comfortable Resorts In Munnar For A Relaxing Stay
